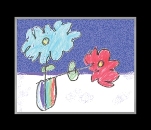
Potato stamps are a great way to create simple or repeating patterns and you can build more complex images by printing in layers.
Lesson Plan Suggestion: Potato stamps are a simple way to understand the relief print making process where extended surface of a printing plate or block are inked and the recessed areas are ink free. Relief printing is one of the traditional families of printmaking techniques which includes traditional text printing with movable type. The world’s first known movable-type system for printing was created in China around 1040 A.D. and the movable type printing press invented by Johannes Gutenberg in 1450 introduced the first mass communication throughout the world.
- Scrub the dirt away from a large baking potato (you don’t want dirt mixing in with your ink or paint) and cut the potato in half.
- Draw the shape you want on the surface of the cut side of the potato with a pencil. Simple shapes like hearts, stars and smiley faces are the easiest to do.
- Cut around the outline of the shape with a kitchen knife or craft knife leaving the design so it is raised on the surface of the potato about 1/4 inch (USING A SHARP KNIFE IS NOT APPROPRIATE FOR CHILDREN).
- Place the cut edge of the potato on a paper towel for a few minutes to absorb any moisture.
- Apply ink or paint to the surface of the potato stamp. You can brush paint on with paint brush, pour paint onto a saucer or plate (paper plates are good for this), or use an ink pad.
- If there is too much paint on the potato stamp, it can slip when stamped onto paper so it is always a good idea to stamp the potato onto scrap paper a few times to remove any excess paint.
- If you want to use the potato again with another color, be sure to wash the potato first.
- VARIATION: Cut the potato in half lengthwise and push a cookie cutter all the way through the cut side of the potato keeping the potato flat on the table.
- Break or cut away the potato outside of the cookie cutter.
- Push the shape out of the cutter and use a paper towel to remove any moisture.
- Apply paint or ink and print as directed above.
